Approximately 60% of women in North America have fine hair and while it can be a challenge for some, we’re teaching you how to use your natural fine or thinning hair texture to create the perfect style.
Mastering the mechanics of weight removal is essential to add density and volume to delicate strands. By utilizing professional shears for precision cutting and internal movement, you can manipulate the texture to create a fuller appearance.
Let’s explore the technical approach on how to cut thin hair to ensure your guest leaves with a style that maintains its shape and body between appointments.

What is Fine Hair?
To maintain professional precision in our consultations, remember: "Fine" refers to the diameter of the individual hair shaft, while "thin" refers to the density, the actual number of strands per square inch.
Fine hair can be separeted into two categories; low density and high density.
Fine hair is limp and more often than not lays flat to the head, yet all fine hair can be easily transformed to give the illusion of fullness and movement with great cutting and styling techniques!
Low density fine hair:
The hair shaft is thin and grows far apart. Think of a forest where trees have a lot of space between them.
High density fine hair:
The hair shaft is thin and grows close together. Think of a forest where trees are close together.
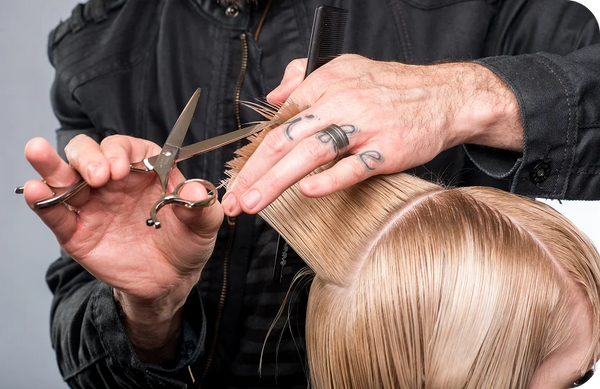
Mastering How to Cut Thin Hair and Fine Hair
- More than any other type of hair, fine hair needs to be cut on a regular basis to keep the shape in tack and ends looking full.
- Blunt cuts will maintain weight and bulk around the perimeter to create dimension and the illusion of more length.
- As fine hair tends to break, notch cut the ends for more of chiseled and chunky look to help camouflage any stressed ends – use a shorter shear for notching so you don’t go too deep into your sections.
- Keep layers long so there is more volume at the scalp and fullness at the ends.
- When cutting, parting the hair at a diagonal back to the crown of the head will impart more volume than parting the hair straight back to the crown.
- Low density fine hair fares best with a shorter length to maximize movement and body or go for a short cut that doesn't require volume.
- Asymmetrical cuts automatically bring the eyes to the longer/thicker/fuller side of the head and the shorter/thinner side can be tucked behind an ear.

How to Cut Fine Hair: Expert Fringe Techniques
Cutting a fringe can make fine hair look fuller, especially when hair is sparse at the hairline. To learn more about how to suggest a fringe to your client, watch this video:

More Fringe Tips & Tutorials:
Below are links to additional video tutorials that can help you when cutting fringe.
How To Cut Angled Bangs:

Mastering Fine Hair Haircuts: Precision Face Framing for Density
Clients with fine and thinning hair deserve a cut that will bring out their best facial features. Most of the time with clients that have fine or thinning hair we want to create fullness or the illusion of thickness, which can be done when utilizing the right cutting techniques.
Normally, you might elevate up and cut lines around the face to create layers that fall away from the face. However, when you do this the hair is less dense and the ends are light and wispy. While this works well for normal to thick textures, fine and thin haired clients need more definition and blunt lines to give the appearance of thicker hair.
Instead of elevating, create defined pieces by free handing – selecting pieces at random but with a purpose to accentuate features of the face for a better visual end result.
Before applying this technique, be sure to discuss what you’re doing with your client in the consultation. Give them reasons about why the technique will add definition and density.
You can even show them the difference as you cut each side. Consider showing them the cut side frame to the opposite uncut side. Give the cut side some movement with your hand and your client will immediately be able to see the difference and LOVE IT because the pieces you choose to cut will add needed definition to the frame and make the hair look denser.
This framing technique is perfect for the client who has a naturally fine hairline and/or for the client who is experiencing thinning around the hairline. The technique is also great for the client who comes in for a cut that was overly layered or overly texturized hair from the last cut.
Learn more about adding face framing layers to fine hair to accentuate facial features in this blog: How to layer fine hair.
Must-Have Tools to Cut Fine Hair:
- Professional dry cutting shear: The power ridges on the back of the blades give the shear stability without pushing the hair away from the blades.

- Sleekr Flat Iron: While this tool is optional, it's a great thing to have on hand to enhance any finished style.

Finishing Products to Style Fine Hair:
- Redken Spray Wax undone texture finishing spray.
While our model already has a cut that is face framing, the ends are light and wispy. We want to simply add definition to her cheekbones and jawline. Here's how we did it:
Step-By-Step:
- Comb the hair to its natural fall.
- Look for that ‘first piece’ of hair that falls along the face – for this model our first ‘piece’ will be cut to accentuate the cheekbone.
- Pinch that piece of hair with the opposite hand of your cutting hand.
TIP – The amount of hair you select in your ‘pieces’ is up to you – it depends just how much definition you and your client agree upon – the more hair you pick up in your ‘pieces’ the more definition you will achieve. - Come into the piece from behind and ‘talk’ the shear (open and close movement) forward toward the cheekbone with the dry cutting shear.
NOTE: This may appear to be blunt once cut, keep in mind the hair is not going to lay on the face, the hair will separate with natural movement with soft ends. - Pinch the next ‘piece’ and use the same technique to ‘talk’ the shear forward toward the jawline.
At this point, from the jawline, we approach longer length and have no facial features to accentuate so we will free hand – visually choose piece by piece – determine the pieces you want to define in the rest of the frame and blunt them off to create a strong frame as opposed to light wispy ends of the frame.
Styling The Look:
- Shake Redken Spray Wax and spritz, evenly distributing onto dry hair.
- Work into the ends of the frame for definition.
- Allow the hair to frame and hug the face or use the Sam Villa Sleekr Iron to flick the ends of the hair up and out for volume.
Want more styling tips? Check out our complete guide to creating curls with a flat iron for step-by-step techniques and pro results.
Mastering the Side-Swept Fringe on Fine Hair
It doesn’t get any better than a classic side-sweeping fringe to flatter any face shape! The variations would include the length your guest desires, the consideration of the density of the hair and the desired amount of texture within the end result. As more and more guests inquire about fringe it’s important to own these three simple techniques to offer this timeless look.
Utilize the Sam Villa Signature Series Reversible Blending Shear for all the three techniques. This shear is the perfect choice for removing length, all while maintaining a soft perimeter edge. The 42 radial teeth will remove a good amount of hair and eliminates blunt lines. The “V” indents at the end of each tooth catch and hold the hair as well as add to the diffused line.
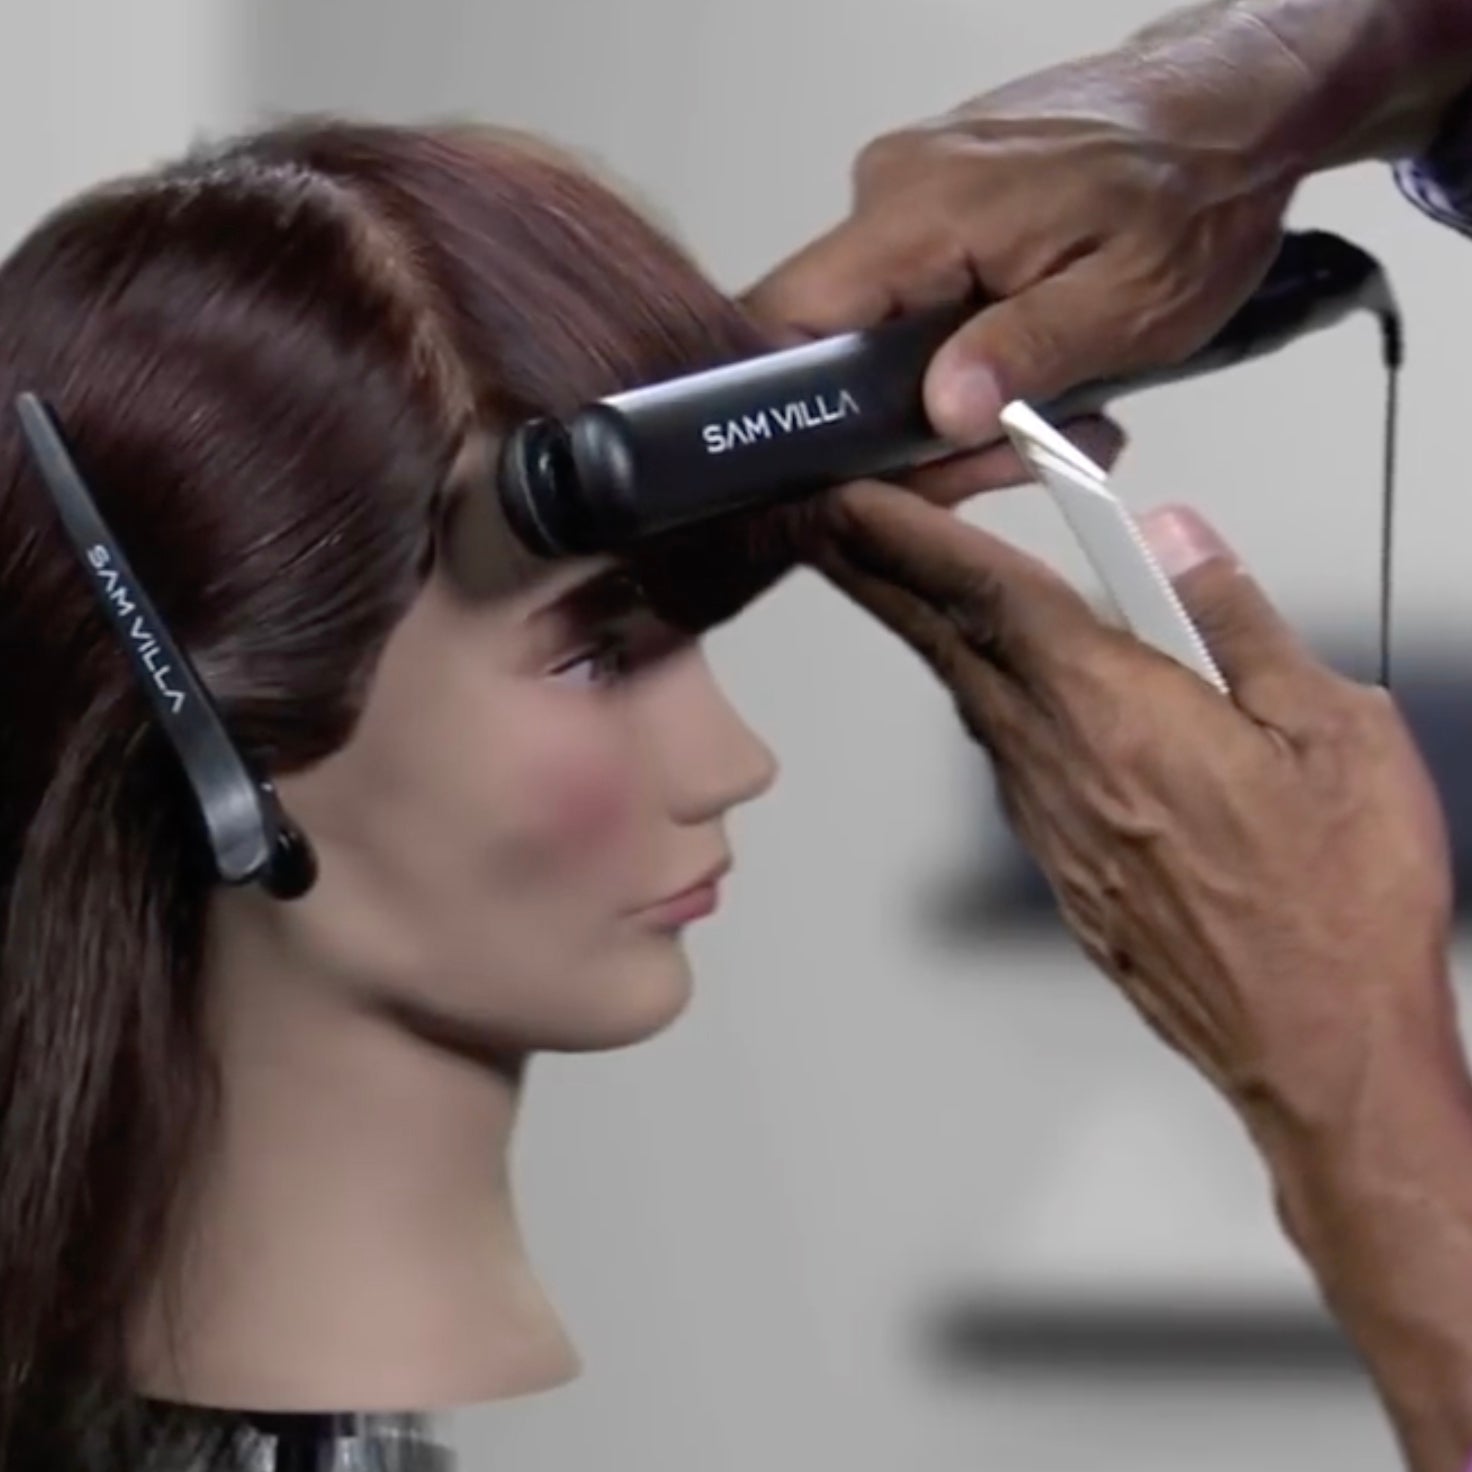
Low Elevation: Weight Management for Fine Hair
Fine hair needs weight to move and supporting our sections at a low elevation will ensure less removal of weight.
- For minimal tension and for cutting at low elevation use the wide toothed end of the Sam Villa Signature Series Cutting Comb in black for light hair or ivory for darker hair.
- Determine the natural part and comb the hair to the opposite side.
- Approach the fringe area from underneath and allow the hair to drop into the wide teeth of the comb.
- Move into the section with the teeth of the shear facing the face.
PRO TIP – When working with a blending or texturizing shear, the hair will be influenced in the direction the teeth are facing. - Determine the amount of length to be removed and cut the line in simply by opening and closing the blade.
- End result is a heavy fringe along with a favorable soft edge and weight maintained for movement.
When Styling Fine Hair: Choose The Right Brush
Round thermal brushes are considered the brushes of choice for adding volume and movement to fine hair. The Sam Villa Signature Series Thermal Brushes have 30% boar bristles and 70% nylon bristles.
Tourmaline Complex has been added to the nylon bristles for smoothing the cuticle and reducing static.
They are designed with hollow and slightly concave barrel cores to speed drying time by directing the hair away from the scalp so that the warm air from the blow dryer can be directed at the root area. Using the cold shot button on your blow dryer locks in solid volume especially on fine hair. The end result is smooth and shiny hair!
75” Thermal
- For super short hair.
- Achieve bend and volume where need.
1" Thermal
- For short hair
- Achieve increased volume and tighter curls.
- Select this brush to achieve frothy volume and tighter curls on shorter hair.
1.5" Thermal
- For medium length hair, above the shoulder.
- Achieve increased volume and loose curls.
- Select this brush to achieve increased volume and loose curls on medium length hair.
2" Thermal
- For longer hair, below the shoulder.
- Achieve smooth waves and flexible curves.
- Select this brush to achieve smooth waves and flexible curves on linger hair.
The Importance of Nozzles for Fine Hair
Nozzles are included with the Sam Villa Professional Ionic Blow Dryer for concentrated airflow. They allow you to work smarter, not harder!
If you are serious about your finishing, you should understand the advantages of using a nozzle:
Wide Nozzles
- Essential for drying long denser fine hair.
- The wider length expands the airflow and dries more hair faster.
Narrow Nozzles
- Essential for drying fringes and frizzy, wavy and curly hair.
- Concentrated airflow produces faster airflow resulting in a more polished finish.
Directing the airflow from the dryer with an attached nozzle from scalp to ends on a lower speed with a higher temperature will actually dry the hair faster without blowing the hair all over exposing the cuticle. End result is shiny hair with less frizz.
HOT TIP: If you are going for a more organic look with a little more volume, dry the hair 75-80% without the nozzle to rough up the cuticle then go back in and finish with thermal brushes.
Don’t suffocate the dryer by making direct contact with the nozzle and the brush. Keep the nozzle at least ½-1 inch away from the brush so you don't a) melt the bristles on your brush and b) damage the motor on your hair dryer causing it to overheat.
For more tips on why and how you should use a concentrator nozzle when blow drying hair.
Styling Products Are Not An Option, They're A Necessity!
Many fine hair clients shy away from product because they feel it weighs down their hair. In reality, they have probably been applying it incorrectly; to the surface of the hair, which makes the hair go flat. Give them the skills to enhance their look with the right products and the right product application.
We, the professional have to understand the fabric… hair texture, and the end result to recommend the proper product for the right reason.
What separates the good from great is usually not specific technical skills but rather visual perceptive skills. While the haircut remains the foundation for any look, technical styling procedures and the actual finish are the true ‘means’ to creating todays organic finishes.
Product application is key because often misapplication of a product is why a client may dislike a product. So always focus on the product where you want the hair to be most responsive to the beautiful cut you just created.
Fine Hair FAQs: How to Cut, Style, and Add Volume
What is the distinction between how to cut fine hair and how to cut thin hair?
While the terms are often used interchangeably, they refer to different characteristics. Fine hair refers to the diameter of an individual strand, whereas thin hair refers to the overall hair density. When performing precision cutting on fine hair, the goal is to support the strand by maintaining weight. Conversely, when determining how to cut thin hair, the objective shifts to preserving bulk to avoid creating gaps in the perimeter.
How do you cut fine hair to build volume and movement?
To create volume, precision is paramount. We recommend maintaining a strong, blunt perimeter to anchor the shape. By keeping layers long and avoiding aggressive texturizing, you ensure the hair retains the weight necessary for movement. Utilizing professional shears for clean lines is essential; excessive removal can cause the hair to appear flat or sparse.
How can you cut thin hair without compromising its density?
The key is to avoid over-layering, which can compromise the appearance of fullness. Focus on blunt perimeters and minimal, strategic layering to maintain a solid foundation. Use professional blending shears with precision to create internal movement without sacrificing the integrity of the bulk.
What are the most effective hairstyles for thin hair?
Styles that create the illusion of density are most successful for the salon professional. Blunt bobs, asymmetrical cuts, and structured, soft face-framing styles provide a solid foundation. Additionally, shorter, intentional lengths often maximize body, while a well-placed, custom-density fringe can create the perception of a fuller hairline.
Can fine hair support a fringe?
Yes, fine hair is well-suited for a fringe when the density is managed with care. A fringe can visually increase the appearance of fullness, particularly around the hairline. The key is to customize the width and depth of the section to ensure it remains cohesive and does not look sparse or disconnected from the perimeter.
How do you enhance volume in fine or thin textures?
Building volume requires a combination of precise cutting techniques and educated styling. Focus on creating blunt perimeters and supporting them with long, structural layers. Behind the chair, utilize high-performance tools, such as a professional round brush, to direct the hair and create lift at the base without weighing the style down. Pairing these techniques with proper ergonomic handling ensures efficiency and consistent, professional results.