Thermal brushes are fundamental for conclusive finished results on medium to fine hair types. Have you ever thought about heating up the barrel of your thermal brush with the heat from your blow dryer prior to placing the brush into your sections?

The heated brush will affect the section immediately as it comes into contact with the hair. Case in point, as the heated brush barrel begins the drying process on the inside of the section, the heat of the dryer assures the drying process on the outside of the section. Double action=faster drying time!
NOTE: Be sure to watch part one and part two of our Foundation Blow Dry Series if you haven't watched those videos yet.
What You Need to Curl Hair with a Round Brush
Getting the technique right starts with having the right tools. Here's what to have ready before you begin.
Tools of Choice:
- Sam Villa Signature Series Thermal Brush.
- Sam Villa Professional Ionic Blow Dryer w/Nozzle.
- Sam Villa Dry Sectioning Clips.
Product of Choice:
Step-by-Step: How to Curl Hair with a Round Brush and Blow Dryer
Step 1: Pre-heat the brush barrel
Before placing the brush into the section, point the blow dryer directly at the barrel for a few seconds to bring it up to temperature. A pre-heated barrel makes contact with the hair immediately and begins shaping the section from the first pass. This is the step most stylists skip, and it's the one that makes the biggest difference in both drying speed and curl definition.
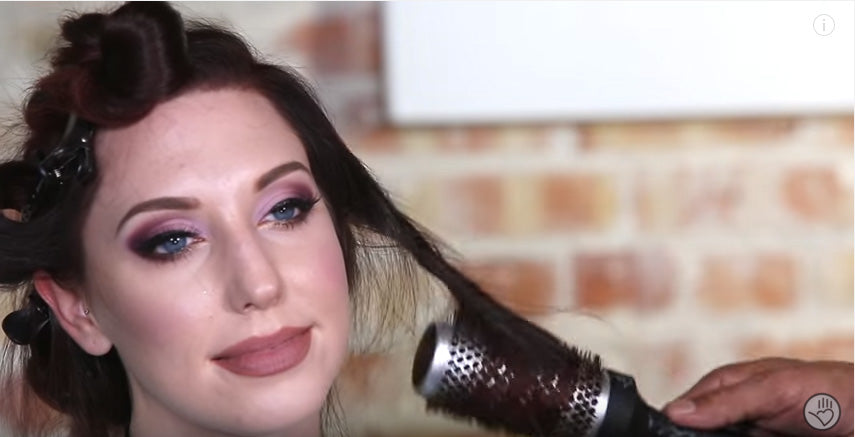
Step 2: Wrap the section while drying
Take sections of approximately 1" to 1.5" depending on the density of the hair. Finer hair benefits from smaller sections for more defined results; medium hair can work with slightly larger sections for a fuller, softer curl. Wrap the section around the barrel and maintain consistent tension from root to ends as you dry. Let the dryer and the brush work together, don't rush the section off the brush before it's fully dry, as residual moisture is what causes curl patterns to drop.

Step 3: Unwrap in the same direction
Once the section is completely dry, point the top side of the brush toward the head. Proceed to unwrap the brush out of the section in the same direction that you wrapped it while drying.
Pro Tip: Maintain a tight coil while unwrapping. Allowing the coil to loosen during this step releases the tension that holds the curl pattern together.
Step 4: Apply hairspray and set the curl
Immediately after unwrapping, apply a light mist of Redken Triple Take 32 to the entire section. Pick up the section with your index finger and overlap with the opposite index finger. Begin a swaying motion, rocking back and forth to wrap the section to the head in a barrel curl.
Secure with a dry sectioning clip and allow the section to cool and rest completely before removing.

Step 5: Release and finish
Once the curl is fully cool, remove the clip. The result is a defined curl pattern with lasting hold. For a softer, more lived-in finish, gently separate the curls with your fingers after all sections have been released. Avoid brushing through the curls, use your fingers or a wide-tooth comb to keep the pattern intact.
This technique makes perfect sense and the end results are outstanding when going for a definite curl pattern in your blow dry. The key is the cooling and resting period to ensure long lasting curl pattern.
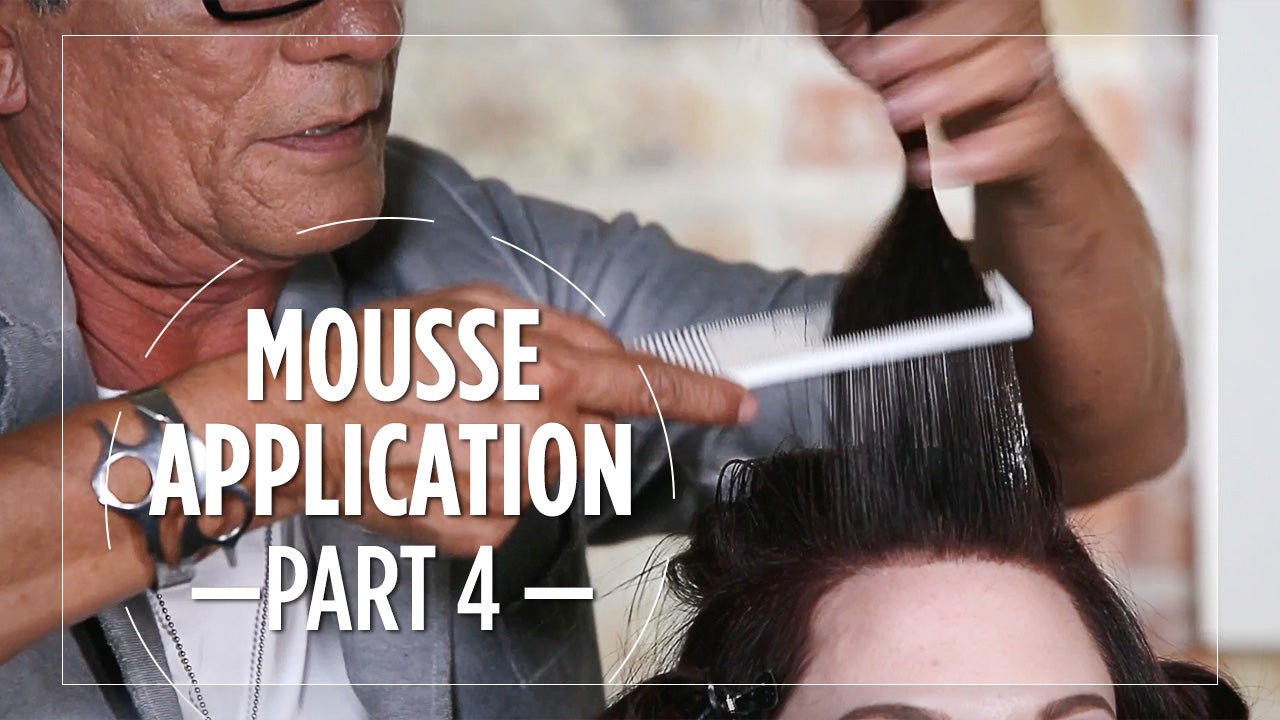
Stay tuned for part four as we show you how to apply mousse prior to blow drying the hair.
Can You Curl Hair with a Round Brush Without Heat?
The short answer is yes, but the result is different. The round brush curl technique relies on heat to restructure the hair's hydrogen bonds, that's what gives the curl its memory and hold. Without a blow dryer, the brush can still be used to shape the hair, but the curl pattern will be softer and significantly less durable.
If you need to minimize heat exposure, for example, on a client with very fine or recently processed hair, lightly mist each section with water or a thermal prep spray before wrapping it around the brush. Allow the section to air dry while wrapped, or use a cool shot from the blow dryer to set the shape without applying high heat. The cooling step and the clip are still essential; skipping them will cause the curl to relax immediately after release.
For clients who want maximum longevity with minimum heat, reviewing foundational blow dry techniques, specifically how products applied before drying affect hold, is a natural next step.
Round Brush Curl Tips by Hair Type
Not all hair responds the same way to this technique. Understanding what to adjust for each hair type makes the difference between a curl that holds and one that drops before the client walks out the door.
Fine to medium hair
The thermal brush technique was built for this hair type. Fine hair lacks the natural grip to hold a curl without structural support, and the barrel heat adds that support from the inside of the section without adding weight.
Keep sections on the smaller side, work at a medium heat setting, and slow down the dryer speed to give the barrel more time to do its work. The cooling and clipping step is non-negotiable for fine hair, it's what keeps the curl from releasing the moment it's touched.
Medium to coarse hair
Coarser hair needs more time in the barrel to absorb the heat fully. Larger sections work well for volume, but if curl definition is the goal, keep sections closer to 1". The dryer can run at a higher speed for coarser hair, but make sure each section is completely dry before unwrapping, coarser hair retains moisture longer and will drop the curl if there's any residual dampness.
The clip and cooling period are just as important here; heavier hair needs the full rest time to set the pattern.
Frequently Asked Questions: Round Brush Curls
How do you use a round brush to curl hair with a blow dryer?
The technique works by pre-heating the brush barrel with the blow dryer before placing it into the section. As you wrap and dry each section, the brush heats from the inside while the dryer works from the outside, this dual action speeds up the drying process and sets the curl pattern more efficiently. Once the section is fully dry, unwrap in the same direction you wrapped, set the curl with a clip, and allow it to cool completely before releasing.
What size round brush is best for curls?
Brush size determines curl size. A smaller barrel — around 1" — creates tighter, more defined curls. A larger barrel, 1.5" to 2", produces looser waves and more volume. For fine to medium hair looking for movement and body, a medium barrel is typically the most versatile choice.
Can you use a round brush on dry hair?
The round brush curl technique is designed for damp hair that is being dried simultaneously. Using the brush on already-dry hair without heat won't produce the same curl memory. If you're working on dry hair, lightly mist the section with water or a thermal spray before wrapping to reactivate the hair's ability to take on a new shape under heat.
How long should you leave the clip in after curling?
Allow curls to cool completely before removing the clip, at minimum 5 to 10 minutes, longer for coarser or denser hair. The cooling period is what locks the curl pattern in place. Removing the clip while the section is still warm causes the curl to relax and lose definition quickly.