Whenever hair is blow dried, there is a risk of damage to strands. Heat damage can lead to everything from loss of volume to dull color and split ends. But, with the right techniques and proper heat protection, it’s easier than ever to get a beautiful finish that also looks after the health of your client’s hair.
The key is understanding what texture (straight, wavy or curly) and type (fine, medium or coarse) you’re working with, and then using the right products, tools and techniques to safely get the look. Whether you’re creating a smooth and sleek or bouncy and voluminous blow dry, we’re detailing the expert tips every stylist should brush up on to blow dry hair without damage.

How To Blow Dry Hair Without Damage
In This Article
Fundamentals- How to blow dry hair properly?
- How long should it take to blow dry hair?
- What is the fastest way to blow dry hair?
- Why does hair look frizzy blow drying it?
- Is blow drying hair with cold air good?
- Is it better to blow dry wet or dry hair?
- Is it okay to blow dry hair every day?
- Is blow dry bad for hair?
- Hot air brush vs blow dryer
The Fundamentals:
How to Blow Dry Hair Properly
With constant use of heat, hair can become dehydrated and dry, which in turn creates a frizzy finish. For this reason, any time you blow dry hair you need to protect strands while also following proper techniques to cut down on damage.
With a little practice, prep, and the right products and tools, you can easily create a flawless blow dry every time that also helps maintaining your client's natural vibrancy.

The Best Tools To Blow Dry Hair
Hair Dryer:

Sam Villa Pro Light Ionic Blow Dryer
A high-quality blow dryer is an important investment behind the chair. Not only will it improve the health of your client's hair, this blow dryer can also speed up the time it takes to dry thanks to its intense power and airflow. An ionic dryer is a great choice because it produces negative ions that counteract the positively charged water molecules in your hair. This leads to sleeker, shinier hair with less drying time, and reduced heat damage. The Sam Villa Pro Light Ionic Blow Dryer is a great choice for smoothing out frizz and preserving definition in curly hair!
If hair is naturally fine or limp, use a non-ionic ceramic hair dryer to avoid flattening the cuticle. And when it comes to wattage, more isn’t always better! Most hair types can be blow dried effectively with around 1,800 watts, while very thick hair may need 2,000 watts or more. For baby-fine or curly hair, start with 1,400 watts and increase as needed.
Discover how to choose a hair dryer in our article.
Nozzle:

Use the concentrator nozzle for straight or wavy hair, and the deep bowl diffuser attachment for curls. The nozzle helps you direct the heat and airflow exactly where you want it.
Round Brush:

A great round brush is key to adding lift at the roots! The bigger the brush, the more volume you can create.
Sectioning Clips:

While it’s tempting to skip sectioning and just rough dry your hair, this can actually extend your drying time and create frizz! Sectioning your hair with clips allow you to fully dry one section at a time, which prevents frizz and damage caused by drying the same sections over and over.
Product:
As Sam Villa says, “Product is not an option, it’s a necessity!” If you’re wondering how to upgrade your salon blow dry, it's all about reaching for the right products. No matter your hair type, it’s essential to use a heat protectant to prep the hair and a finishing cream, oil or hairspray to lock the look in.
How To Blow Dry Straight Hair
The Steps:
- After shampooing and conditioning the hair, use a microfiber towel to gently squeeze out excess water. If possible, let the hair air dry until it’s 50-60% dry. If this isn't an option, use a towel to remove as much moisture as possible because you want to avoid using a blow dryer on sopping wet hair.
- Next, apply a heat protectant spray, volumizing mousse or lightweight styling cream to the hair. Comb through with a wide tooth comb or damp brush.
- With your dryer set on medium heat and high air speed, rough dry hair without a brush until it’s about 80 percent dry.
- Section off the hair on top of your crown and clip it into place. Then separate the lower layers into 3-4 small sections and secure with clips.
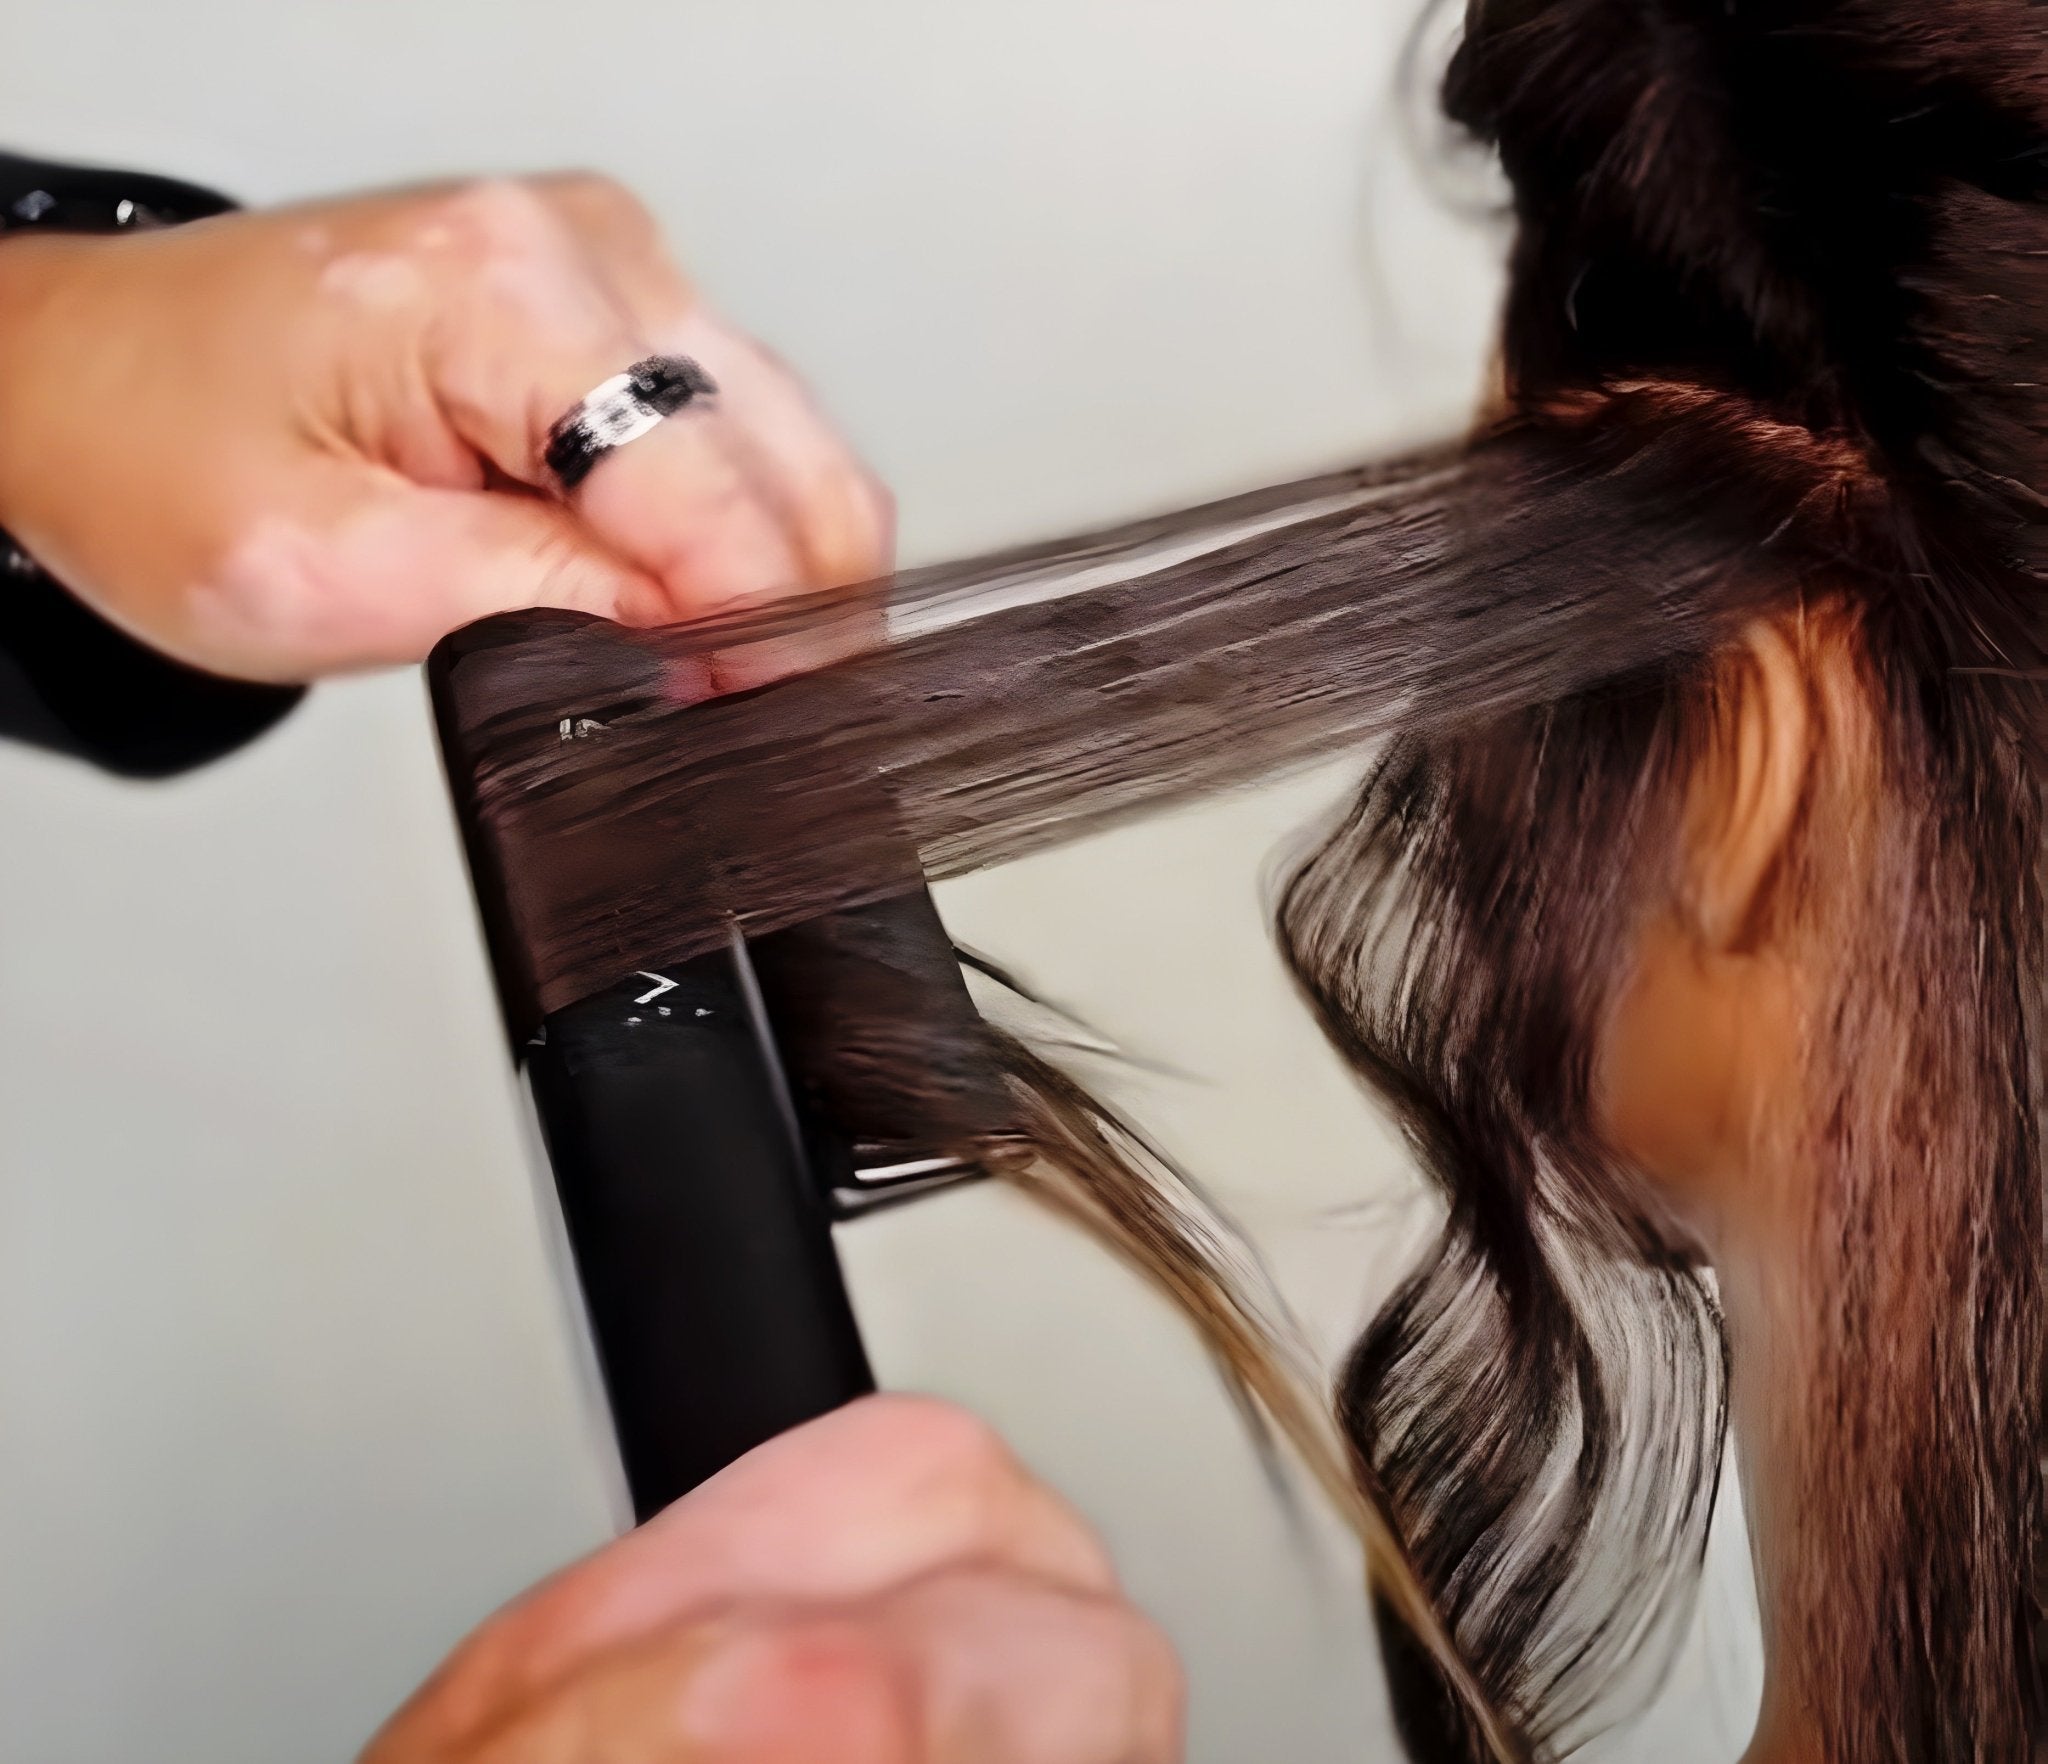
- Dry each of the lower sections of hair from roots to tips. Place the round brush under each section near the roots, and rotate the brush out and away from the face as you move slowly down the hair shaft. For maximum shine, point the nozzle of the blow dryer in the same direction as the hair and maintain constant tension with the round brush.
- After drying each layer, clip it out of the way. For a soft curl, clip the ends underneath (as if you were wrapping the hair around an invisible roller). Or secure the sections in low, loose ponytails for a straighter look.
- Remove the clip on top and blow dry the top section. Use the round brush to lift hair at the roots for extra volume, then rotate the brush forward and out as you work towards the ends.
- Remove all clips and shake out the hair. To curl the ends, roll them under with a round brush, blast with heat, and set with cold air. For a straight finish, pull the brush all the way through the ends while drying with warm air, and set with cold air.
- Apply styling cream to smooth out any flyaways, or mist with lightweight hairspray to help the blow dry hold.
How To Blow Dry Curly Hair with a Diffuser
The Steps:
- After shampooing and conditioning the hair, use a microfiber towel to gently squeeze out excess water. If possible, let the hair air dry until it’s 50-60% dry. If this isn't an option, use a towel to remove as much moisture as possible because you want to avoid using a blow dryer on sopping wet hair.
- Apply a leave-in conditioner to damp curls, then use fingers to work a defining curl gel into the hair from roots to tips. Then grip the ends, shake your hands from side to side, and release to allow curls to spring back up into shape.
- With your dryer set on low or medium heat and medium air speed, use the diffuser attachment to blow dry the roots, starting at the nape of your neck. Avoid blow drying curly ends because this can cause dryness and frizz. Keep moving the diffuser around your scalp until the roots are dry.
- If you want extra volume, place the diffuser directly against the scalp and rotate it (left, right, left, right) as you blow dry.
- To finish, apply a small dab of pomade to your palm and rub your hands together to warm the product. Starting at the front of the hair, sweep your hands through the curls from roots to tips (as if you were pulling your hair into a ponytail). Then release the curls and tousle hair at the roots for added fullness.
How Long Should It Take to Blow Dry Hair?
The amount of time it takes to blow dry hair varies depending on the hair type, texture, and desired style. As a general rule, longer and thicker hair requires extra drying time. For short hair, a quick blow dry should take about 5-15 minutes. For long, coarse and/or curly hair this can take anywhere from 20-45 minutes. Always allow extra time in your schedule to blow dry your hair curly or wavy texture types.

What Is The Fastest Way to Blow Dry Hair?
If you’re running late it might be tempting to aim the blow dryer at soaking-wet hair and start blasting away, but this is really bad for the hair!
There are no shortcuts when it comes to blow drying hair without causing damage, but there are a few tricks to speed up the process. To help you save time and reduce heat damage, try these tips to blow dry your hair faster.
Tips To Blow Dry Hair Faster
- Use a quality conditioner. This is key for healthy hair, and it also prevents hair from absorbing too much water.
- Shake it out! Before beginning your blow dry, flip your client's head upside down and gently wring out the hair with your fingers.
- Air- and/or towel-dry thoroughly. Ideally, hair should be at least 50% dry before you even reach for the blow dryer or hot brush. This helps achieve the hairstyle you want but with less heat and drying time. To help speed up this process, use a microfiber towel (or towel turban) to soak up excess water. Focusing on the roots, gently blot or squeeze the hair and avoid harsh rubbing motions.
- Detangle with a wide tooth comb or damp brush. Note: If hair is curly and tends to frizz up when combed, skip this step.
- Pick targeted products. Before blow drying, prep hair with a “quick blow dry” product that wicks away moisture from your strands.
- Go ionic. An ionic hair dryer emits negative ions that break apart the water droplets in damp hair for faster, smoother styling and gorgeous shine.
- Blow dry each section only once. Use clips to section off your hair and start with the lower layers. Work through each section slowly so you don’t have to redry the same sections multiple times..
Why Does Hair Look Frizzy After Blow Drying It?
If you struggle with frizzy hair after blow drying, it’s a sign that you’re blow drying the hair wrong.
Hair can become frizzy from blow drying sopping wet hair, not fully drying the hair, holding the hair dryer too close, blow drying in the wrong direction, or using the wrong dryer, brush or products. Read on to discover exactly how these mistakes can cause frizz when blow drying hair.
Common Blow Dry Mistakes that Cause Frizz
- You’re blow drying sopping-wet hair. Wet hair is more fragile than dry hair, so exposing it to hot airflow and a harsh bristle brush can cause breakage and frizz. It also takes more time to dry and style dripping-wet hair, which means more heat exposure and damage. Instead, pat wet hair with a soft towel to absorb excess water, then let your hair air dry at least 50% of the way before picking up the blow dryer.
- You’re not fully drying your hair. If your hair frizzes up a few minutes after a blow dry, chances are you may not have fully dried it. Even a small amount of water left in the hair can make the cuticle swell, creating frizz. To fix this blow drying mistake, work in small sections and brush slowly through the hair while applying heat from your blow dryer. This helps ensure that every strand gets 100% dry.
- You’re holding the hair dryer too close. Heat is damaging to hair, so it’s important to hold your dryer’s nozzle at a safe distance. Even for ultra-sleek hair, your hair dryer should never actually touch your hair. Keep it at least one inch away from the hair’s surface, and avoid holding the dryer in one place for too long.
- You’re blow drying in the wrong direction. Directing the airflow up the hair shaft roughs up the cuticle, causing it to frizz! Instead, blow dry down the hair in the direction that the hair grows with a concentrator nozzle to help direct air flow. This will smooth the cuticle for a sleek and glossy finish.
- You’re using the wrong dryer, brush or products for your hair. Quality tools are essential for creating a beautiful blow dry. Look for an ionic and/or ceramic dryer with several heat settings, so you can dry your hair with the minimum heat required.
- You're using the wrong brush. Round brushes with natural boar bristles are better for some hair types than a metal brush. This is because sometimes metal brushes can heat up too much and dry out the hair.
- You're not using enough product. Don’t skimp on products. Always prep your hair with a heat protectant before blow drying! This minimizes heat damage from your blow dryer, which prevents future frizz and can give your blow dry a boost of softness, shine and volume.

Is Blow Drying Hair with Cold Air Good?
The simple answer is that hot air is best for styling hair, while cold air locks a finished style in place.
- Blow drying with hot air is faster than drying with cold air, and it’s an effective way to change the style. For example: blow drying your wavy hair straight or adding volume to limp hair.
- Cold air seals the cuticle of the hair shaft for a smooth and shiny finish and helps set the style. This is why it’s often recommended to apply cool air after blow drying with hot air.
- Heat is damaging to hair, so blow drying with cold air is a healthier choice for your strands. Plus, it would take a long time to dry and style damp hair using only cold air, but cold air is great for touching up dry hair or setting a heat style.
- The takeaway is that if you’re trying to fix a bad hair day or give yourself a new look, blow drying your hair with warm or hot air is the way to go. For a boost of natural shine and lightweight hold, go with cold air.

Is It Better to Blow Dry Wet or Dry Hair?
Blow drying hair that’s too wet or too dry can result in heat damage, dullness and frizz. For this reason, it’s actually best to blow dry damp hair, not dripping-wet or bone-dry hair. Blow drying damp hair is the best way to achieve the style you want with minimal damage.
- Wet hair is fragile and prone to breaking, so it’s better to let your hair air dry at least halfway before exposing it to heat from the blow dryer.
- If you’re short on time, use a microfiber towel to pat the hair as dry as possible.
- The less time you spend blow drying, the better for your hair health.
- Blow drying hair that’s already dry isn’t great for the hair either. The hot air from the dryer can strip hair of natural moisture, leaving it frizzy and dull. Plus, dry hair is less manageable than damp hair, so it might be tougher to shape the style the way you want.
- If you want to blow dry your hair without washing it first, spritz it with water and a heat protectant spray to dampen the hair.
Is It Okay to Blow Dry Hair Every Day?
Unfortunately, any amount of heat is damaging to hair, so using a blow dryer, flat iron, or curling wand every day is not the best idea. Daily heat exposure can ruin hair by stripping the hair’s natural oils and drying out the cuticle, causing breakage and frizz.
But, client's don’t have to give up the blow drying entirely! With some simple changes to any styling routine, client's can enjoy beautiful hair every day and maintain their hair’s health for years to come. Here are a few ways to get great hair without blow drying every day:
- Blow dry every 3-5 days. If hair is blow dried correctly, the look should last for several days. To extend your client's style use a lightweight finishing spray after blow drying hair. Then, extend the style with a dry shampoo or smoothing cream.
-
Use the minimum heat required.
When hair is blown dry hair, go easy on the heat. Let the hair air dry as much as possible (at least 50% dry for curly hair and 70-80% dry for fine hair), then use the heat to shape and style. Hold the nozzle safely away from the hair, keep it moving constantly, and avoid over-drying.
-
Master the art of the air-dry. Many people don’t like air drying because their hair dries frizzy. But occasionally skipping a blowout and letting your client's hair air-dry can make a huge difference in keeping their strands smooth and healthy. To prevent frizz, use a moisturizing conditioner, comb and follow with a targeted curl product. The best air-drying products depend on their hair type. Try a lightweight smoothing cream for fine/straight hair, an oil-lotion hybrid for wavy hair, or a hydrating mousse for curls.

Is Blow Drying Bad for Hair?
While any form of heat styling can be harmful to hair, most of the damage is caused by incorrect techniques and over-styling. Properly blow drying the hair will give beautiful results with minimal damage. However, if hair is already brittle or heat-damaged, it is best to avoid blow drying while you work on restoring your hair’s natural health and vibrancy. Most people with healthy hair can safely blow dry their hair 1-3 times a week.
Using A Hot Air Brush vs. Blow Dryer
What's the difference between a blow dryer and a hot air brush? While both tools can be used to dry and style damp hair, a hairdryer is the best choice for a full blowout and a hot air brush is best for shaping and finishing the hair.

Heated styling brushes save a step by allowing you to dry, polish and shape your hair at the same time. However, since a hot air brush doesn’t provide as much heat as a regular blow dryer, it can take much longer to get your hair fully dry. For this reason, it’s recommended to use your blow dry hot brush on dry or slightly damp hair. If you’re starting with wet hair, consider pre-drying it with a towel and your blow dryer, then finishing it with a blow dry hot brush.
| Hot Air Brush | Blow Dryer | |
|---|---|---|
| Best for drying hair | ✓ | |
| Best for styling hair | ✓ | ✓ |
| Best for touch-ups | ✓ | |
| Styling time | 15-20 minutes | 25-30 minutes |
| Heat level | Medium to high | Low to medium |
| Works on damp hairr | ✓ | ✓ |
| Works on dry hair | ✓ | |
| Built-in smoothing brush | ✓ |
How To's:
How to Blow Dry Natural Hair
Blow drying can make natural hair more manageable, reduce tangles, and allow your client to wear their hair in styles that might not be achievable with air-drying. However, blow drying natural hair takes extra care. If done improperly, it could ruin the natural curl pattern, cause split ends, and make hair dry and frizzy.
Follow these steps to blow dry natural hair while protecting your beautiful curls:
The Steps:
- Start in the shower. Blow drying can dehydrate natural hair, so always use a moisturizing shampoo and conditioner designed for curls. If you have time, give your client a deep conditioning treatment or hair mask. Detangle at the shampoo bowl or with a damp brush for easier styling.
- Towel dry, then air dry. Cotton bath towels can break curly hair, which is even more fragile when wet. Instead, gently squeeze out excess water with a soft microfiber towel and let hair air dry at least 50% of the way before blow drying it.
- Add Heat Protection. Heat protection products are essential for minimizing damage to curls. Work a nourishing leave-in conditioner and hair cream into the hair from roots to tips.
- Go easy on the heat. Use a high-quality ceramic and/or ionic dryer with multiple heat settings, which allows you to blow dry with the minimum amount of heat necessary.
- Dry hair in small sections. With the heat setting on medium-low and the speed on high, point the dryer’s nozzle down the hair shaft. Avoid blowing up the hair, as this can damage the cuticle. Work in small sections and pull the hair taut with your brush as you dry it. Tension gives a smoother finish with more shine!
- Seal in moisture. After blow drying, apply a shea butter lotion or oil to nourish curls and restore moisture.
How To Blow Dry Hair Straight
A sleek, silky-smooth blow dry is the perfect versatile hairstyle. Whether hair is naturally straight, wavy or curly, you may be wondering about the best way to blow dry hair straight. The secret to a flawless finish is to add lots of volume with a round brush! Follow these simple steps to blow dry your hair straight:
The Steps:
- Use Microfiber. After washing and conditioning the hair, use a microfiber towel to gently squeeze out excess water. If possible, let the hair air dry until it’s 50-60% dry. Never use a blow dryer on sopping wet hair!
- Apply Heat Protectants. Apply a heat protectant spray, volumizing mousse or lightweight styling cream to the hair. If hair is naturally wavy or curly, work a dab of leave-in conditioner through the ends. Comb through hair with a wide tooth comb or damp brush.
- Start Sectioning. Section off the hair on top of the crown and clip it into place. Then, separate the lower layers into 3-4 small sections and secure with clips.
- Dry Thoroughly with Tension. Dry each of the lower sections of hair from roots to tips. Place the round brush under each section near the roots, hold the concentrator nozzle of your blow dryer over the hair and rotate the brush out and away from the face as you move slowly down the hair shaft. Maintain light, constant tension with your round brush (you should feel a slight tug). For straight ends, finish each section by blow drying while pulling a paddle brush through the hair. For beveled or curled ends, use a round brush to shape the ends.
- Build In Volume. Remove the clip on top and blow dry the hair at the crown. Use a round brush to lift the hair up and back at the roots while rotating the brush away from the face for more volume.
- Enhance The Face Frame. If you have side bangs or face-framing layers, place your round brush over each layer and hold the concentrator nozzle of your blow dryer under the hair. Rotate the brush out and away from the face as you apply hot airflow from your dryer.
- Finish with Products. Finish a straight blowout with an all-over blast of light hold hairspray. If they have thick or dry hair, apply a few drops of argan oil to the ends.

How To Blow Dry Curly Hair
Curly hair texture tend to be more dry, for this reason when blow drying curly hair, it’s essential to preserve the hair’s moisture and protect natural curl definition. The right tools and products make all the difference so follow these steps to blow dry curly hair with ease.
The Steps:
- Detangle. After washing and conditioning your hair in the shower, detangle your curls with a wide-tooth comb and use a microfiber towel to gently squeeze out excess water because you want to avoid using a blow dryer on sopping wet hair.
- Apply A Leave-In. Apply a leave-in conditioner to damp curls, then use fingers to work a defining curl gel into the hair from roots to tips. Then grip the ends, shake your hands from side to side, and release to allow curls to spring back up into shape.
- Dry The Roots. With your dryer set on low or medium heat and medium air speed, use the diffuser attachment to blow dry the roots, starting at the nape of the neck. Avoid blow drying curly ends, which can cause dryness and frizz. Keep moving the diffuser around the scalp until all roots are dry.
- Enhance Volume. Want extra volume? Place the diffuser directly against the scalp and rotate it (left, right, left, right) as you blow dry.
- Finish with Fullness. Apply a small dab of pomade to your palms and rub hands together to warm the product. Starting at the front of the hair, sweep hands through curls from roots to tips (as if you were pulling the hair into a ponytail). Then release the curls and tousle the hair at the roots for added fullness.
How To Blow Dry Hair for Volume
A voluminous blowout is one of the most alluring and beautiful styles for all hair types. Follow these steps to get more volume in any blow dry.
The Steps:
- Wash and condition your hair. Use a volumizing shampoo and conditioner. Comb through any tangles and use a microfiber towel to gently squeeze out excess water.
- Ditch the nozzle. This is especially important for fine hair, which tends to fall limp and flat. Remove the nozzle from the blow dryer, flip the head upside down, and rough dry hair without using a brush until hair is 80% dry. This will help the hair cuticle to expand, creating more volume and texture.
- Prep with product. Apply a volumizing mousse to the hair, working from back to front to avoid weighing down the front sections with too much product.
- Section the hair. Start at the top of the crown and clip it into place. Then separate the lower layers into 3-4 small sections and secure with clips.
- Use a large round brush for added volume. Replace the concentrator nozzle on your blow dryer and start drying the lower sections of hair. Place the round brush under each section near the roots, hold the nozzle of your blow dryer over the hair and rotate the brush up, out and AWAY from the face as you move the airflow slowly down the hair shaft. Maintain light, constant tension with your round brush (you should feel a slight tug).
- Blow dry the hair at the crown. Use the round brush to lift the hair straight up and back at the roots and twirl the brush back and away from the face for more volume.
- Finish with face-framing pieces. If your client has side bangs or face-framing layers, place the round brush over each layer and hold the concentrator nozzle of your blow dryer under the hair. Rotate the brush out and away from the face as you apply hot airflow from your dryer.
- Step #8: Set your style with finishing spray. Choose a lightweight hairspray to avoid weighing down the gorgeous volume you've just created!

How To Blow Dry Thick Hair
Thick hair is undeniably gorgeous, but it can take a long time to dry. If you want to get clients out of the chair without spending hours on their hair, the right products and techniques can make all the difference. Check out these proven steps to blow dry thick hair fast.
The Steps:
- Use a moisturizing shampoo and conditioner. Thick hair tends to be dry and requires extra hydration. A high-quality conditioner with nourishing oils helps hair to repel water, smooths the cuticle, and protects thick hair from heat and humidity.
- Towel dry, then air dry. Gently squeeze out excess water with a soft microfiber towel and let the hair air dry at least 50% of the way before blow drying it. If you have time, wait until your hair is 70-80% dry. This will cut down considerably on the amount of time you need to spend styling.
- Detangle. Use a a wide-tooth comb or a damp brush for best results working from the ends up to the roots.
- Prep with product. Before blow drying, prep hair with a “quick blow dry” product that wicks moisture away from the strands.
- Use an ionic dryer. Ionic hair dryers emit negative ions that break apart the water droplets in damp hair for faster, smoother styling and gorgeous shine. They also cut down on drying time for thick, heavy hair. Look for a dryer with at least 2000 watts and a range of heat and speed settings.
- Go BIG. When blow drying thick hair, a large round brush with natural boar bristles is your best option.
- Work in manageable sections. Use clips to section off the hair and start with the lower layers. Work through each small section slowly so you don’t have to re-dry the same sections multiple times.
- Focus on the roots. Dry each of the lower sections of hair from roots to tips. Spend the most time near the roots, because the ends usually dry quickly on their own. Place the round brush under each section near the roots, hold the concentrator nozzle of your blow dryer over the hair and rotate the brush out and away from the face as you move slowly down the hair shaft. Maintain light, constant tension and spin your round brush. Then repeat this process with the round brush placed over the section and the blow dryer underneath. Make sure that each section is fully dry before moving on to the next one.
- Build volume at the crown. Use the round brush to lift the hair up and back at the roots and rotate the brush away from the face for more volume.
- Finish the face-framing pieces. If your client has side bangs or face-framing layers, place your round brush over each layer and hold the concentrator nozzle of your blow dryer under the hair. Rotate the brush out and away from the face as you apply hot airflow from your dryer.
- Smooth and polish. Lock in the blow dry with a burst of cold air, then apply a hair gloss or oil for added softness and shine.
How To Blow Dry Short Hair
Blow drying short hair can be a real challenge! While it takes less time to dry than longer hair, short hair is easily damaged by high heat and tends to frizz up. If your short hair looks amazing at the salon, but you’re struggling to achieve the same look at home, follow these steps to blow dry short hair:
How To Blow Dry Short Hair Straight
The Steps:
- Prep with a heat protectant. Prep your hair with a blow dry primer to prevent breakage and protect delicate hair from heat damage. Spray the product all over your hair and comb it through for even distribution.
- Section. Divide your hair into four sections (left, right, crown, and back). Secure each section with a small clip.
- Blow dry section by section. Beginning with the lower sections, unclip one section at a time. With your dryer set to medium heat, place a small round brush under each section near the roots, hold the concentrator nozzle of your blow dryer over the hair and spin the brush out and AWAY from the face as you move slowly down the hair shaft. Maintain light, constant tension with your round brush to add shine. Continue this process until the left, right and back sections have been dried.
- Add volume at the crown. Remove the clip on top and blow dry the hair at the crown. Use your round brush to lift the hair up and back at the roots and rotate the brush away from the face for more volume.
- Finish. Apply a blast of cool air from your blow dryer, then spray the hair with a soft-hold hairspray.
How To Blow Dry Short Hair with a Textured, Lived-in Finish
The Steps:
- Prep with a heat protectant. Prep the hair with a blow dry primer to prevent breakage and protect delicate hair from heat. Spray the product over the entire head and comb it through for even distribution.
- Create a side part. Add a deep side part in your hair and work a small amount of pliable styling paste through the ends.
- Blow dry with fingers. Blow dry the hair, focusing the airflow in the direction you want the hair to go. For a natural, “undone” finish, finger-comb the hair while drying instead of using a brush. Twist small sections of hair with your fingers as you blow dry for added texture and separation.
- Add texture. After the hair is dry, use your fingers to create more definition and texture. If desired, add a bit more styling paste to your ends.
How To Blow Dry Long Hair
Love your long hair, but don’t love spending hours with your blow dryer? With the right tools and techniques, you can streamline your long hair styling routine and still get beautiful results. Read on to discover how to blow dry long hair faster.
The Steps:
- Use a shampoo and conditioner designed for long hair. A high-quality conditioner with nourishing oils helps your hair to repel water, smooths the cuticle, and protects your hair from heat and humidity. If your hair is thick or dry, seal your ends with a leave-in conditioner.
- Towel-dry, then air-dry. Gently squeeze out excess water with a soft microfiber towel and let the hair air-dry at least 50% of the way before blow drying it. If you have time, wait until the hair is 70-80% dry. This will cut down on the amount of time you need to spend styling with a blow dryer.
- Detangle. For best results use a wide-tooth comb or wet brush.
- Prep with product. Before blow drying, prep hair with a heat protectant and/or a volumizing mousse.
- Use an ionic dryer. Ionic hair dryers emit negative ions that break apart the water droplets in damp hair for faster, smoother styling and gorgeous shine.
- Go BIG. When blow drying long hair, use a big round brush with natural boar bristles for best results.
- Work in manageable sections. Use clips to section off the hair into small sections and start with the lower layers. Work through each section slowly so you don’t have to redry the same sections multiple times.
- Focus on the roots. Dry each of the lower sections of hair from roots to tips. Spend the most time near the roots, since the ends tend to dry quickly on their own. Place the round brush under each section near the roots, hold the concentrator nozzle of your blow dryer over the hair and rotate the brush out and away from the face as you move slowly down the hair shaft. Maintain light, constant tension and spin your round brush. Then, repeat this process with the round brush over the section and the blow dryer underneath. Make sure that each section is fully dry before moving on to the next one.
- Blow dry hair at the crown. Use the round brush to lift the hair up and back at the roots and rotate the brush back and away from the face for more volume.
- Finish with the face-framing pieces. If your client has side bangs or face-framing layers, place your round brush over each layer and hold the concentrator nozzle of your blow dryer under the hair. Rotate the brush out and away from the face as you apply hot airflow from your dryer.
- Smooth and polish. Lock in your blowout with a burst of cold air, then finish with a hair oil for thick, dry hair or a soft hold hairspray for finer hair.
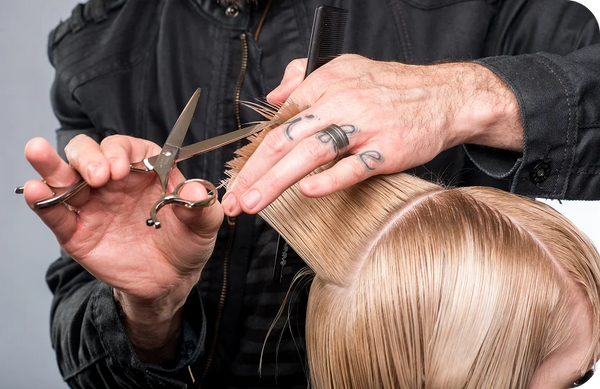
How To Blow Dry Men's Hair
Blow drying is an essential skill for styling men's hair. With just a few simple tools and 5-10 minutes, you can reshape the hair, add volume, and really highlight the cut or color you've created. The key to a great men’s blow dry is to take it slow and shape the style as you dry. Follow these simple steps to learn how to blow dry men’s hair.
The Steps:
- Wash, condition and towel-dry. Shampooing the hair removes any residual product so you can start fresh with a new style. Conditioner is essential for rehydrating the hair and preventing split ends. Before you pick up the blow dryer, towel dry the hair thoroughly. Then, use your blow dryer on damp hair, not dripping-wet hair.
- Apply product. At minimum, you need a heat protectant product to minimize damage from heat styling. Depending on the look you're styling, you may also want to apply another product that works in damp hair, such as a styling paste, cream or mousse. Some styling products also provide heat protection, so check your labels!
- Go for less heat and more speed. It’s easy to use too much heat on short hair, which can result in dryness and damage. Instead, start with low-medium heat and high speed. For faster drying times, use an ionic dryer.
- Shape the style your client wants. Blow drying lets you direct the hair where you want it to go. Using a small round brush, pick up a small section of hair at the roots. Rotate the brush up and back as you pull it through the hair while pointing the concentrator nozzle of your blow dryer down the hair shaft. For a more structured style like a pompadour, take breaks while blow drying to comb the hair into place.
- Don’t rush it. Working in small sections actually saves time while blow drying. This allows you to fully dry each section before moving on to the next one, which also prevents frizz.
- Lock in the look. When all your hair is dry, finish off your blow dry with a blast of cool air from your dryer. Then, apply a water-based pomade to your ends. This versatile product lets you create a variety of shapes and textures with your hair, plus it prevents flyaways.
Summary
These tips and techniques will help you level-up your blow drying routine in the salon. The key to a great blow dry is taking the time to properly prep and section the hair before you turn on the dryer. Working with small sections of hair and using a brush to create tension saves time because when you’re not blow drying the same hair over and over, it creates a sleek and glossy finish.
If applying product, sectioning your hair, and juggling a blow dryer and round brush feels a bit intimidating, don’t stress! With practice, the right tools, quality products and a little practice, you can create a beautiful blow dry without damage.
Frequently Asked Questions
How do you blow dry hair without causing heat damage?
Damage-free results come down to prep and control, not luck. Always start with a heat protectant, let hair air-dry to at least 50% before introducing heat, and work in small sections so you only pass over each one once. Keep the dryer moving, hold it at least an inch from the hair, and direct airflow down the shaft to keep the cuticle smooth.
Should you blow dry wet or damp hair?
Damp, never dripping. Soaking-wet hair is fragile and far more prone to breakage under heat and tension, while bone-dry hair loses natural moisture and turns dull. Towel-dry or air-dry to roughly 50–60% before reaching for the dryer for the cleanest, healthiest finish.
What's the difference between a hot air brush and a blow dryer?
A blow dryer delivers the power and airflow for a full blowout and works on both wet and dry hair. A hot air brush dries, smooths, and shapes in a single pass, making it ideal for finishing and touch-ups on dry or slightly damp hair. Many stylists pre-dry with a dryer, then refine the shape with a hot brush.
How often can hair be blow dried safely?
Most healthy hair tolerates one to three blow dries per week. A correctly executed blowout should hold for several days, so you can extend the style with a lightweight finishing product or dry shampoo rather than re-styling daily. For brittle or heat-damaged hair, pause heat styling until the hair's condition is restored.
Why does hair frizz after blow drying?
Frizz almost always traces back to technique: blow drying hair that's too wet, leaving sections under-dried, holding the dryer too close, or directing airflow up the shaft instead of down. Working in small sections with steady tension and a concentrator nozzle keeps the cuticle flat for a smooth, polished result.
Is cold air worth using at the end of a blow dry?
Yes. Hot air shapes and styles the hair, while a final blast of cool air seals the cuticle to lock in the style and add shine. It's the simplest way to build hold and longevity into a finished blowout without reaching for more product.
How do you build volume in a blow dry?
Volume is built at the roots. Rough-dry without the nozzle to expand the cuticle, then use a large round brush to lift each section up and back at the base while rotating away from the face. A volumizing mousse before drying and a lightweight finishing spray afterward support lift without weighing the hair down.
Which products are essential for a blow dry?
At minimum, a heat protectant to prep and a finishing product to lock in the look. From there, choose by hair type — a volumizing mousse for fine hair, a leave-in or curl product for textured hair, and a smoothing cream or oil for thick or dry ends.
How long should a blow dry take?
It depends on length, density, and texture. Short hair typically dries in 5–15 minutes, while long, coarse, or curly hair can take 20–45. Building extra time into the schedule for textured hair protects both the finish and the integrity of the hair.
What's the fastest way to blow dry hair without damaging it?
There are no shortcuts past good prep, but you can save real time: condition well, towel- or air-dry to at least 50%, detangle, use an ionic dryer, and section the hair so you dry each piece only once. Speed comes from working methodically, not from cranking up the heat.