Master the Art of Hybrid Hair Cutting with Sam Villa

The movement towards detached cutting, weight removal and lived-in organic texture is showing no signs of slowing down! Does that spell the end of precision cutting?
Absolutely not!
Right now it’s all about using classic techniques in new and innovative ways. Sam Villa teaches a predictable, systematic approach to creating a blended haircut with built-in soft volume and texture. The key is working in small sections and choosing the right elevation, over-direction and finger angle to get the results you want. It’s the perfect way to maintain control over the cutting process and create a soft, lived-in finish at the same time.
Read on to learn how to cut a graduated bob with discipline for beautiful softness and natural movement.
Sectioning for the Graduated Bob
Step #1
Start with damp hair. Create a triangle-shaped section with the fringe hair, then separate a horseshoe-shaped section at the crown of the head. Secure these sections in place with Signature Series Hair Sectioning Clips.

Step #1
Place your comb against your guest’s head, just above the ear. Mark the spot behind the ear where the comb leaves the head. This should be about half an inch behind the ear. Section off the hair in front of this point, comb it forward and secure with clips. Repeat on the other side of the head.
PRO TIP: Bringing your side sections slightly further back helps to prevent a hole in the graduated bob.
Step #3
Working with the hair in the back, create a horizontal parting to separate the nape area from the center back. Secure the center back section (the hair above the parting) with a clip, leaving the hair in the nape section loose.
Cutting the Graduated Bob [Nape]
Step #1:
Prep the hair in the nape area with Redken One United. Take a small triangle-shaped subsection on one side, elevate it up against the head, and allow the hair to collapse inside a sectioning clip as you secure it above the ear. Repeat on the opposite side.

Step #2:
Pick up the piece of hair at the center of the nape, which will serve as your guide. Elevate this hair to a low diagonal (about 45° from the neck). Place your fingers into the hair at a diagonal.
Step #3:
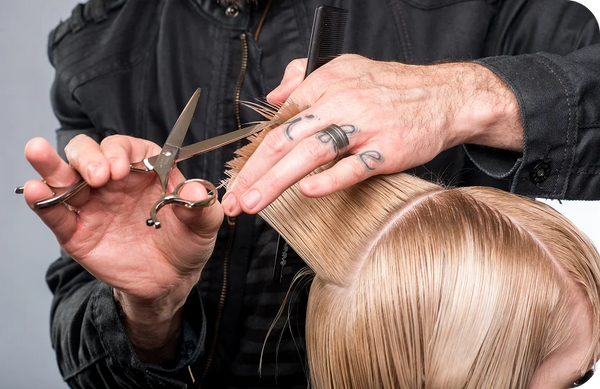
Scan through the hair with your Streamline Series Shear, using a soft open-and-close motion with the shears and resting the guiding blade on the ring finger of your non-cutting hand. Keep the shears vertical to the hair as you work.

Step #4:
Release a small piece of hair from the right triangle subsection and clip the rest of the hair out of the way. Add this hair to the guide and elevate to a low diagonal. Place your Signature Series Short Cutting Comb underneath the section, comb through the hair and fold up the ends until you find the guide. Slide your fingers down the hair shaft to the guide. Scan through the hair with your shears, using the same open-and-close movement. Repeat on the opposite side.
Step #5:
Repeat
Step #4
With the rest of the hair in the nape area, working from the center outward and alternating between the left and right sides for a balanced shape. Bring the comb underneath the sections and over-direct to the previously cut section. This gives you better consistency and cutting control.
PRO TIP: Do you struggle to maintain precision control when you’re working with bigger over-directions or wider sections? Sam recommends subdividing the hair into smaller vertical sections, which makes it so much easier to find your guide piece and connect the dots.

Step #6:
Comb through the nape section to cross-check the perimeter and clean up the line with your shears, if needed.
Cutting the Graduated Bob [Center Back]
Step #1:
Release the center back section from the clip, mist it with water, and divide it into two halves along the midline.

Step #2:
Starting on the right side, create a horizontal parting and secure the hair above the parting with a clip. Separate a narrow horizontal subsection from the bottom of the lower section, just above the nape area.
Step #3:
Comb this subsection over the nape area until you reach the perimeter of the hair in the nape. Then scan cut the hair to the length of the perimeter. This piece will serve as a guide for the rest of the section.

Step #4:
Comb the hair upwards from the nape and let the shorter hairs fall out. Elevate the section vertically, square your hand to over-direct the section towards the center, and scan cut the hair to the length of the guide.

Step #5:
Comb the hair back down over the nape area. This cutting technique preserves the length in the back by creating a detached center-back section that floats softly over the blended undercut in the nape. If you want a shorter center-back section, go back in with your shears to remove length.
Step #6:
Moving on to the left side, extend the horizontal parting across the head and secure the hair above the parting with a clip.
Step #7:
Use your comb to pick up a “slice” of hair from the right section that you just cut to use as a guide. Add this hair to the left section and bring the comb underneath the hair. Square the comb, elevate the section vertically, and find the guide piece.
Step #8:
Place your fingers into the hair just above the guide. Remove the comb and scan cut the section to the length of the guide.
Step #9
Comb the left and right lower sections down over the nape area. Check the perimeter and trim any overhanging hairs.
Step #10:
Release the upper right section from the clip. Separate a narrow horizontal subsection from the bottom of this section.
Step #11:
Comb this subsection over the nape area until you reach the perimeter of the hair in the nape. Then scan cut the hair to the length of the perimeter. This piece will serve as a guide for the rest of the section.
Step #12:
Add the guide piece to the upper right section, comb through the hair and elevate it vertically. Square your hand, over-direct the hair to the center and scan cut to the length of the guide.

Step #13:
Release the upper left section from the clip. Use your comb to pick up a “slice” of hair from the right section that you just cut to use as a guide. Add this hair to the left section and bring the comb underneath the hair. Square the comb, elevate the section vertically, and find the guide piece.
Step #14:
Place your fingers into the hair just above the guide. Remove the comb and scan cut the section to the length of the guide.
Step #15:
Comb the left and right upper sections down over the nape area. Check the perimeter and trim any overhanging hairs.
Cutting the Graduated Bob [Sides]

Step #1:
Release the hair on the right side from the clips.
Step #2:
Comb through the hair with the wide teeth of the comb (no elevation) and cut the section to the length of the bob.

Step #3:
Add a slice of hair from the center-back section that was just cut to use as a guide. Elevate the side section vertically with no over-direction. Visually identify the guide and scan cut the ends to this length.
Step #4:
Repeat Steps #1-3 on the left side.
Cutting the Graduated Bob [Crown]
Step #1:
Take the crown and fringe sections out of the clips. Over-direct the fringe hair forward.
Step #2:
Separate a small piece of hair from the tip of the triangle-shaped fringe section. Over-direct this hair forward and scan cut it where it reaches the hairline. This will be your guide for cutting the crown section. Isolate the fringe hair with a clip.

Step #3:
Pick up a narrow vertical section of hair from the center of the crown section. Add some of the short hair from the center back section and the newly-cut guide from the fringe section to this hair. Comb the hair together and elevate it diagonally (in-between horizontal and vertical).
Step #4:
Scan through the hair, connecting the dots between the two shorter pieces.
Step #5:
Use the Signature Series 6” Shear to point cut deeply into the ends of the section.
Step #6:
Pick up another narrow vertical section next to the first one. Add some of the short hair from the center back section and the guide piece from the fringe section to this hair. Comb the hair together, elevate it diagonally and over-direct it to the center.
Scan through the hair, connecting the dots between the two shorter pieces, then point cut into the ends with the Signature Series 6” Shear.
Step #7:
Repeat
Step #
6 with the rest of the crown section, working across the head in narrow vertical subsections (parallel to the midline) and over-directing everything to the center.
Step #8:
Comb the crown section into place. Check the perimeter and trim any overhanging hairs, using the lower sections as a guide.
Removing Weight in the Fringe

Step #1:
Take small vertical sections and elevate to 45 degrees above the horizontal 90 and cut into the ends of your section with the 14 Tooth Point Cutting Shear. A few passes should suffice for most hair types-- be careful not to over-texturize!
Taking a Fresh Approach to Haircutting
Today’s top trending hairstyles feature lived-in, natural texture with lots of natural movement. However, it’s still helpful to follow a structure and keep the fundamentals of precision cutting in mind while creating these loose, free-flowing haircuts. Working in small sections and being intentional with your elevation and over-direction are essential for achieving blended, invisible texture.
Mixing classic techniques with new trends empowers you to create consistent results while keeping it fresh and FUN behind the chair. Don’t forget to follow @SamVillaHair on Instagram for more incredible hair education and inspiration!